Flows
In this article
What are Flows?
Adding a Flow
Adding stages and actions
Adding and removing people from a Flow
Processing people through Flows
Batch processing multiple people through Flows
Flow reporting
Archiving and deleting Flows
What are Flows?
Flows are a powerful and incredibly versatile feature that enable you to break down repetitive "people-processing" tasks into Stages, with each stage having a choice of preset Actions that can be processed for each person when they become due. Helpfully, Flow Managers receive timely reminders of Flow progress and notifications when tasks are due or overdue. Flows are the perfect alternative to unwieldy spreadsheets, ensuring no one falls through the cracks of admin processes in a busy office.
The Flows functionality exists in all the 'people' modules - Address Book (contacts), Children (children and young people), Giving (givers) and Bookings (customers). Flows can be module-specific or a Flow can exist across multiple 'people' modules. For example, you might have a "Safeguarding Checks" Flow that's visible in the Address Book and the Children module. When viewed from within the Address Book, module users can process contacts, but for the same Flow viewed from within the Children module, module users will see children and young people shown. Note that some actions are not supported in all modules e.g. Key Dates.
For multi-site customers, Flows exist across all sites but the site being viewed by the user determines the people that they see listed. For example, a user viewing a Flow as Site A will only show people belonging to Site A but viewing as 'All Sites' will show all people in the Flow for that module.
To help get you started, navigate into the Flows section of the Address Book module, where we've provided a selection of Example Flows that you can install on your account; or read on to create your Flow.

In the remainder of this article, we'll work within the Address Book, but the same principles apply to creating/managing Flows in the Children, Giving and Bookings modules.
Adding a Flow
Navigate to the Flows section of the appropriate module and click Add flow.

On the Add flow pop-up, give the Flow a suitable Name. The Send reminders setting lets you choose which days of the week managers and assigned users will receive their Flow reminder notifications - perhaps on preferred working days or not at weekends. Next, set the modules in which the Flow is to be Visible in. Note that Managers are module-specific, meaning that you can assign different managers in each module that the Flow is set to be visible. Finally, use the Visible to setting to optionally restrict Flow visibility to just yourself or selected user groups - see our related support article for further information about restricting the visibility of certain features. Click to Save the Flow.

You are now taken to the new Flow "View" page which summarises the Flow settings just added. Note the option to Add manager.

On the Add manager pop-up, select the User who will be responsible for oversight of the Flow. Only a User with at least Use permissions for the module the Flow is set visible in will be able to interact with the Flow, so do ensure the Flow Manager has the relevant module permissions.

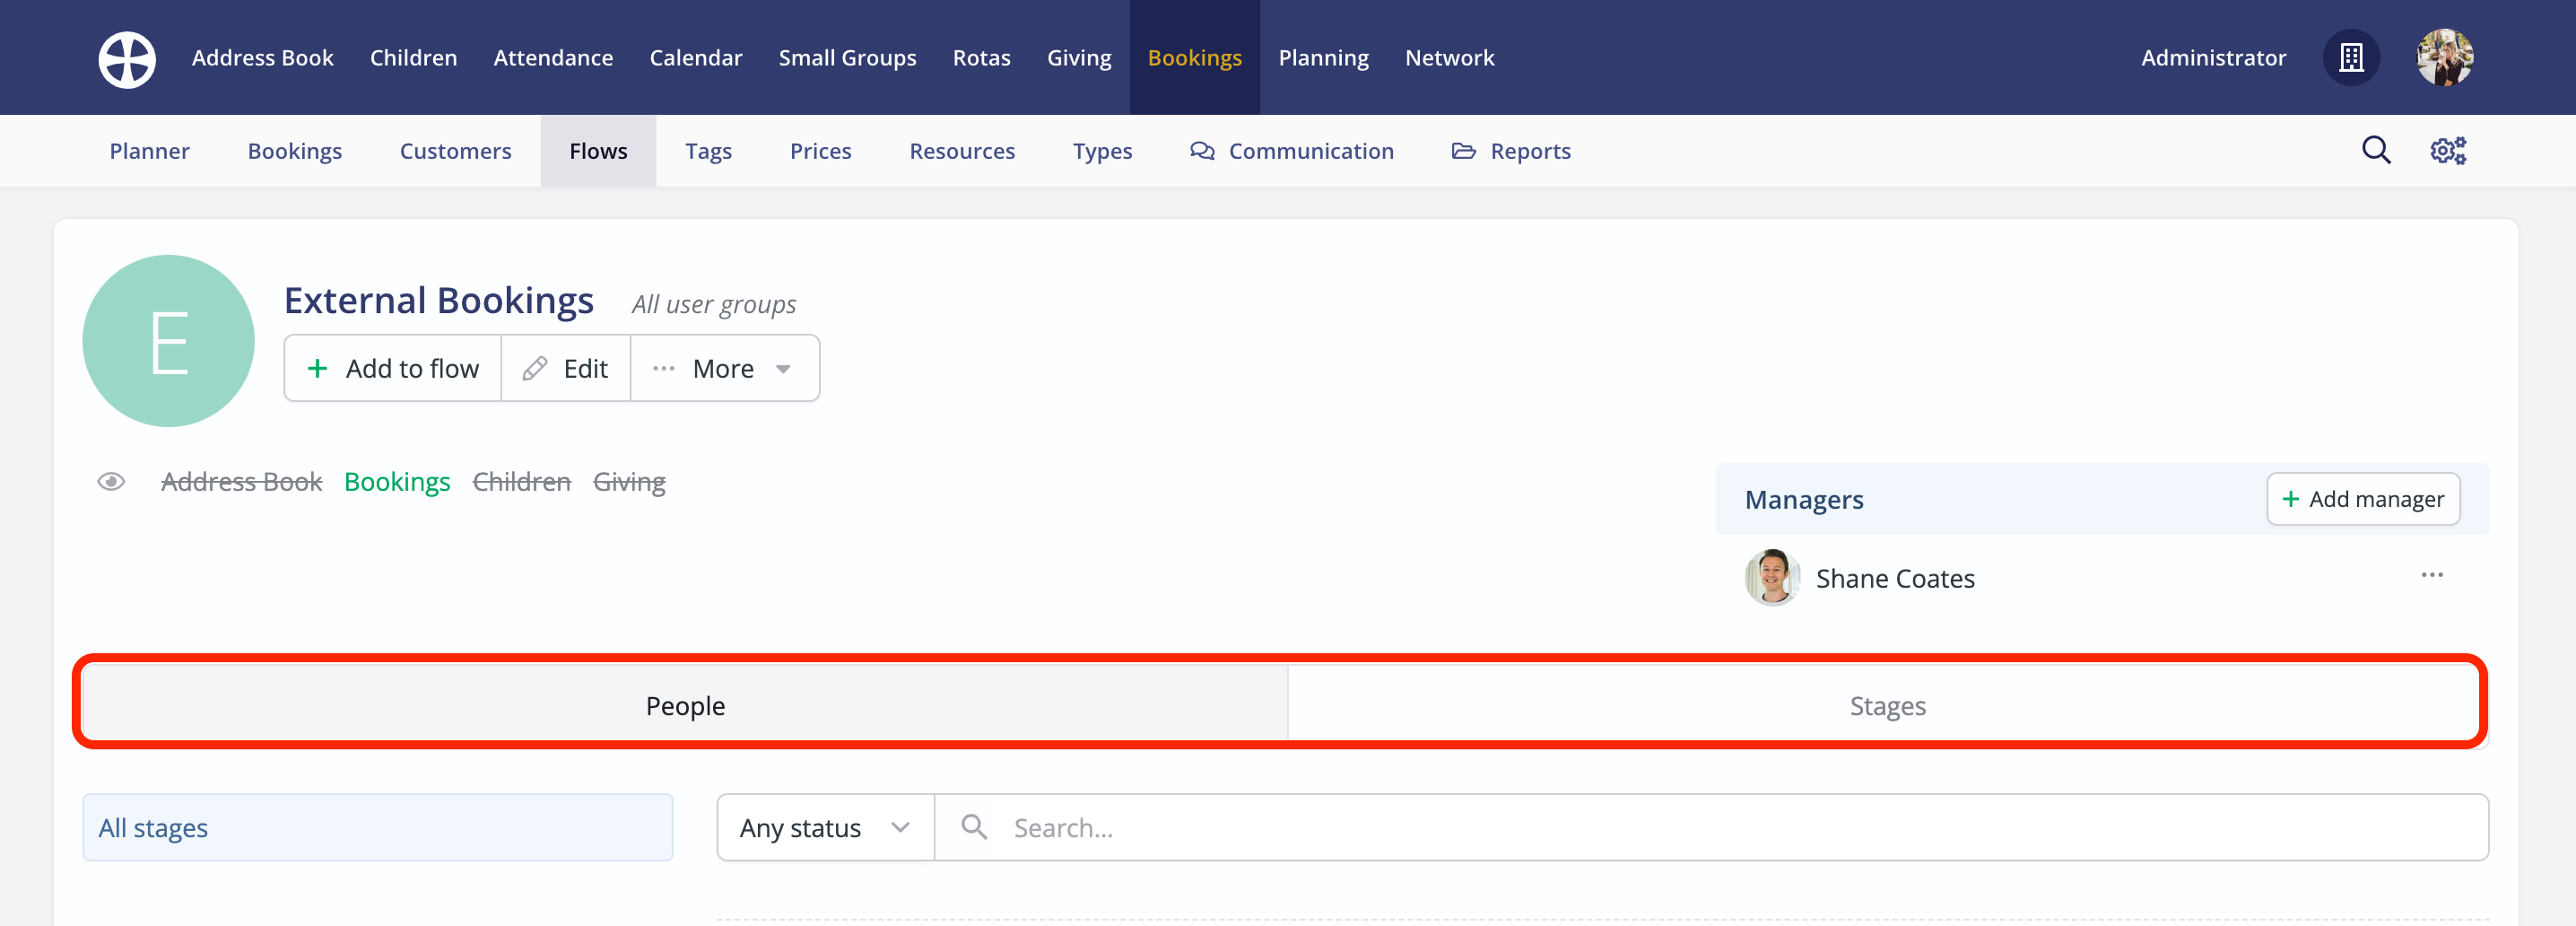
Managers receive timely reminder notifications when actions become due for those who have been added to the Flow. Reminders are only sent on the specified Send reminder days. Multiple managers can be assigned if you wish. Note also that the Flow has two, currently empty, tabs: People - the list of people in each stage of the Flow, explored later in this article; and Stages - which we will look at in the next section of this article.
Adding stages and actions
Introduction
Flows are essentially a series of Stages, within which preset Actions are defined. Later in this article, we'll see that when people are added to the Flow they are processed through each stage of your admin processes, optionally processing one or more of the preset Actions as each stage becomes due.
Building a Flow is a great opportunity to review your existing administration processes. When planning out the stages of a Flow it will be helpful to first think of the process from beginning to end, the time intervals between each distinct stage, and the actions that happen at each stage of the process. For example, if your early day's newcomer integration process involves sending some initial welcome information by email, then making a welcome phone call a little while later, then sending a friendly SMS, followed up finally with a further welcome phone call, that would require four stages to the Flow, perhaps over a 30 day period, during which you'd like to do those four things at defined intervals. You'll find it helpful to avoid the 'monster flow' that attempts too many stages in a single Flow. You will avoid bottlenecks in your processes by breaking more complex processes into multiple Flows. Remember, a person can only be in each Flow once at any one time, but they can be in multiple Flows at the same time. Having multiple Flows will help enable multiple parts of a process to happen simultaneously, and enable you to share different aspects of a process with the most appropriate members of your team.
As we'll see, when adding Stages to a Flow, you will be able to specify whether the time interval between two stages is relative to the date a person was first added to the Flow or based on the date they were processed through the previous stage.
You may find it helpful to first add all of your stages and then add the stage-specific actions after. Some actions may be relational actions, such as making a telephone call, but other actions may relate to things happening in ChurchSuite as each person is processed - such as adding a Key Date representing the date of a phone call or adding a Note against the person for any follow-up that may be needed.
Adding stages
Let's begin by adding the first stage. Working on the Stages tab of the Flow "View" click Add stage.

On the Add stage pop-up, give the stage a suitable Name. Add some Instructions for your Flow users to explain how to complete this stage. Select when actions for people added to this stage will become Due, noting that this can be based on the interval after first Being added to the Flow or a set interval after processing from the Previous stage. The Due interval determines whether the status of each person's stage actions is pending, due, or overdue today. Note that users processing people through each stage of the Flow will be able to change each person's next Due date, perhaps to postpone the Actions to a later date. In this regard, the Due interval represents the preferred interval between each stage of the process.

Optionally specify a User to be Assigned for the Flow stage. For example, it's sometimes helpful to designate a specific person to be responsible for a particular stage of the process - maybe you have a preferred person who has a friendly telephone manner that you wish to make all the phone calls for a "Welcome call" stage, or perhaps it's an authorised team member that is always required to complete a particular part of an official process.
Note also that where a Flow is visible in multiple modules, the Assigned user for a Flow stage is module-specific, so you can assign different users to the same stage in each module.
Assigned users will receive email reminder notifications when those in their designated stage become due or overdue. They'll continue to receive reminder notifications until either 1) the person is processed into the next stage, 2) the person is assigned (delegated) to a different user or 3) the Due date is changed/postponed. User reminder notifications follow the same sending schedule as manager notifications, so 'due' and 'overdue' emails will only be sent on the Flow's Send reminder days.

Finally, click Save to add the new stage. The Stages tab will update, with each new stage added to the end of the list of Stages. Note the options to Edit a stage, should you wish to make changes. You can also change the Order of stages, perhaps if you later change your processes. Flow 'people' will remain in the same re-ordered stages, with the same due dates. Do remember that your Flow may be visible in other modules, so changes made to Stages will apply there too. Stages that are no longer needed may be deleted but, as you can only Delete an empty stage, you will first need to process all people out of that stage (including those in that stage in other modules) before the deletion will succeed.

Continue adding further stages as necessary. When you are finished, you can begin adding actions.
Adding actions
Still working on the Stages tab, and for each Stage in turn, you can now add Actions, which your Flow users can optionally choose to process for each person. Each stage will always need at least one Move-to-stage action to ensure people can be processed into other stages; without this navigation action, they would get stuck in the stage. With this in mind, you may find it helpful to begin by first adding all the Move to stage navigation actions to each stage of your Flow and then adding the other stage-specific actions afterwards. Click Add action.

On the Add action pop-up, select the Move to stage action from the drop-down list, which will then surface the option to select the Stage that Flow people should be processed into from the current stage. You can add multiple "Move to stage" actions to a stage if users are to have a choice of the next stage to process people into. While Flows have a linear stage order, you have complete flexibility to add navigation actions that move people back to a previous stage or forward, or even skip stages if you wish. Finally, the Add action pop-up allows you to set the action's Default state, selected or unselected. Typically, your most commonly-processed actions should default to a selected state. An unselected default state is helpful for infrequent actions or where a user will be expected to choose from several actions. We'll see the default action states in more detail later in this article.

Finally, click Save to add the action. The Stage tab is updated to show the newly added action. Continue adding navigation actions to each stage in the Flow. Note the Actions menu to Edit or Delete an action if needed. As shown in the example below, for any stage where your Flow processes will come to an end - perhaps in the last stage of the Flow - you can add a Move to stage action with the Stage value Completed, which will enable your Flow users to process people out of the Flow entirely once everything is completed.

Having first added navigation actions, let's now look at the other actions available for use. The actions you choose to use will depend on the stage Instructions you have added i.e. what needs to happen at each stage. Working methodically from the first stage of the Flow, add further actions to a stage by clicking Add action. The example below shows the full Action list. Not all actions are available in all modules. In most cases, selecting an action from the list will surface a further field related to that action. For example, selecting the Add tag action will enable you to select the specific tag to be added, while selecting Send email will enable you to select the Preset email you wish to be sent at that stage.

Continue adding Actions to each Stage as required. Where multiple actions are added to a Stage, notice the option to re-order the actions, perhaps moving the most commonly processed ones to the top of the list.

Having finished adding actions to each stage, you're now ready to test that the Flow works as expected when in use, perhaps by first adding yourself to the Flow and processing yourself through each stage to review the user experience. For example, you may discover a pertinent action is missing from a stage, or that the order or default state of actions needs fine-tuning. As you use Flows, you may find you want to make adjustments to the due date interval between Flow stages, perhaps where the anticipated timings are proving unrealistic if people's busyness needs factoring into your processes. The next sections of this article explain how to add people to Flows and process them.
Adding and removing people from a Flow
In this section, we explore how to add people to the Flow (and remove them, if necessary). In the next section, we then look at how to process people through a Flow as tasks become due. We've made it easy to add people to Flows throughout the platform, wherever your users are working with people. Let's look at some examples of where you'll see the Add to flow action available:
1. On a Flow "View"
Located at the top of every active Flow is the Add to flow button. You can't add people to Flows that have been archived.

2. On a person's profile
You can add contacts, children, givers and customers directly to a Flow from their profile page in the respective modules using the Add to flow action on the Add drop-down button menu located at the top of the profile page, or on the Flows widget on their Engagement tab.

3. On a tag "View"
When working within the Tags section of the Address Book, Children or Giving module, notice the Add to flow action on the Add drop-down button menu at the top of a tag's "View" page.

4. On an event "View"
When viewing the list of Sign-Ups, Invites or Check-Ins on an event's "View" page in the Calendar module, notice the Add to flow action on the Add drop-down button menu at the top of each list.

5. On 'People' reports
In all modules, when viewing many of the reports that include people in the results, there's an Add to flow action on the Add drop-down button menu at the top of the report.

6. As batch actions
When selecting multiple people from a list of people - like the Contacts section of the Address Book - note the Add to flow batch action available:

Adding people to Flows
Wherever a User is accessing one of the Add to flow actions outlined above, the Add to flow pop-up has the same options to select the Flow and Stage they wish to add the selected people. Clicking into the People field, a user can optionally add further people or selected people can be removed by clicking the 'x' by their name. Click Add to flow to add all the selected People to the selected Flow stage.

User feedback prevents users from adding people who are already in the selected Flow - a person can only be in a Flow once at any one time.

Removing people from Flows
You can easily remove individual people from a Flow by clicking the Action menu on the right-hand side of their name in the list on the People tab - select Remove.

There are also batch Actions, which include the option to Remove multiple selected people from a stage in one action.

Processing people through Flows
Introduction
As we begin this section, it may be helpful to remember that Flows are a feature of your admin-facing ChurchSuite modules. Processing people and managing Flows can only be done by authorised module Users. Flows are not accessible via the member-facing My ChurchSuite; your My ChurchSuite members will be unaware of which Flows they may be in.
Since Flows are only accessible to module Users, Flow stage reminder notifications and Manager digest emails are sent to the user's email address, not their linked contact email address. Sent Flow reminders and Digest emails are therefore recorded in the User's communication log.
When viewing the Flows section of the Address Book, Children, Giving or Bookings module, module users will see an overview of the process status of people in each Flow: pending (grey), due (green) and overdue (red) actions. Clicking on a coloured status pill will open the Flow to view, filtered for that status, or click on a Flow Name to open the Flow unfiltered.

From the Flow "View", the People tab shows the same status summary in the blue section on the left. Clicking on a stage name from the summary list will bring that stage into focus, or click on the coloured status pills to see a filtered list of people in that stage with just that status - pending (grey), due (green) or overdue (red). Note also the Status filter at the top of the list of people - defaulting to 'Any Status' - and the Search bar, which can be used to locate people within a long list who may be at any stage - the Search auto-filters as you type.

Each person's Status and Due date are shown. Any 'Pending' status people - representing new people added via a web-embedded form - will first need to be Set as active before they can be further processed. As each person's stage actions become due, click Process, which will open a pop-up through which you can review the actions to be processed and process them.

Processing people
The Process pop-up is divided into two tabs. The Details tab gives users access to basic contact details and note history. Users can also add Notes - ideal for recording appropriate details of a phone conversation or any follow-up that may be needed. By default, Notes are added with the same visibility restriction as the Flow itself, so if your Flow's visibility is restricted to the "Welcome Team" user group, any notes added here will also be restricted to the "Welcome Team" user group too - the note Visible to can be optionally changed before the note is saved.

The Actions tab (the default tab) presents the User with their Instructions, the Due date and Assigned user (which can be changed without running actions, perhaps to postpone the task or delegate tasks to another user) and a list of Actions. It's the selected actions that will be processed when the Run Actions button is pressed.

As illustrated in the example below, a person will only be processed into another stage if a "Move to stage" action is selected. Finally, note that selecting some actions will surface additional fields when selected. For example, a selected "Add key date" action will surface additional fields for the user to enter the date of the key date and an optional key date description. In the example below, the "Send email" action includes the option to further Personalise the preset email before sending when the actions are run. Flows are incredibly powerful and versatile!

Helpfully, current Flow activity is surfaced when viewing a person's profile page. Clicking through to the Engagement tab will list any Flows the person is in, the flow stage, the due date and the processing status. Clicking on a Flow name on a person's profile will redirect the user to the Flow and automatically open the Process pop-up for that person.

Assigned users - intended functionality
People are added into a Flow stage with the Assigned user specified in the Flow's settings. In the example below, Corey James has been added to the Welcome Call stage of the Flow - a stage assigned to user Aled Parry in the Flow's settings. Corey will remain assigned to Aled throughout subsequent stages of the Flow until the Assigned user is changed.

A change of Assigned user always takes priority over assignments specified in the Flow's stage settings. This feature has many uses. For example, you may have a welcome Flow where newcomers are added to the Flow with no user Assigned but are then manually Assigned to a particular pastor or welcome caller. Each newcomer will remain assigned to that user throughout the Flow unless a different user is assigned at a later stage.
When a person's Assigned user is removed, without an alternative user being assigned, that person will resume being assigned to the Flow's default Assigned users when they are next processed. In this way, you could manually assign a user to a person for some stages of a Flow and later remove that assigned user, so that the person reverts to being assigned to the user specified in the Flow's settings when they are next processed.
Additionally, you can view the tracking history of those currently in a Flow, using the View history action.

This will surface the flow actions that have been processed for that contact and the User who processed them:

Batch processing multiple people through Flows
In addition to processing individuals, you can easily process multiple people in a single process. Working on the People tab, use the checkboxes to select the people to be processed and select Process from the drop-down Actions menu.

The Process pop-up opens, confirming the number of people selected. As with processing individuals, users can optionally change/update the Due date and Assigned user (with or without running actions). The default Actions are pre-ticked but you can change the selected actions as needed. Click Run Actions to process the selected actions for all the selected people.

Flow reporting
Accessible via the View completed action on a Flow's "View" page, you can view a Flow Completed report that gives amazing insights into the tracking data of those previously processed through a Flow.

The Flow Completed report can be filtered to a specific set of Dates and by any active Flow:

Clicking on the Days in Flow pill counter opens a pop-up showing the tracking history, the actions processed, when, and by which User.

Note that the report only includes people who have been fully processed through the Flow. People who have been removed from the Flow are not included in the results - their Flow-tracking data is deleted when they are removed.
Finally, Flows can be referenced as Options in Smart Tag conditions - ideal for identifying people who match a set of conditions, including whether they are in (or not in) any flow or a specified flow currently.

Archiving and deleting Flows
Care should be taken when deleting a Flow, which is a permanent and irreversible action that has destructive consequences. Always consider first archiving a Flow that is no longer needed - archived Flows can be set as active again. Do remember that a Flow may be set visible in other modules, so archiving or deleting the Flow may impact the admin workflows of other module users who may still be using the Flow.
When archiving a Flow, any people still in the Flow (in any module the Flow is visible in) will remain unchanged. Flow reminders will no longer be sent for the Flow. You can optionally remove people from an archived Flow if you wish.
Deleting a Flow that is set to be visible in other modules will only delete the Flow from the one module being viewed. The Flow will persist unchanged in the other modules. Deleting a Flow will remove all people from the Flow for that module. Remember that Flows may be referenced in conditions in Smart Tags and be referenced in your module options for other features such as Connect and Embed.
To archive or delete a Flow, click Archive or Delete from the Flow's "View" page...
...Or select Archive or Delete from the Flow Actions in the Flows section of a module.
