Fixed tags
In this article
What are tags?
Assigning people to a fixed tag
Managing tags
What are tags?
Tags are one of the most commonly used and versatile features in ChurchSuite, enabling you to group or categorise people within a growing database of Address Book contacts, Children module children and young people, Giving module givers and Bookings module customers. Tags enable you to direct communication to specific groupings of people and also to filter reports to just see results for a selected grouping of people.
Your ChurchSuite database of contacts, children, givers and booking customers will likely contain people from a wide variety of contexts with varying levels of engagement with your church, charity or ministry; tags help you to categorise those people and stay organised! For example, you might use tags to group together your Members or those who are parents/carers, those in small groups, those you consider to be suppliers, or those you consider Leaders.
Tags are module-specific - a tag cannot include contacts, children, givers and customers - this would require four tags, one in each module. Tags must be uniquely named within a module, although the same tag name can be used in other modules. It's not uncommon for the list of tags to grow over time, so a consistent tag naming convention will help your users, and perhaps also choose different colours to distinguish tags that exist for a similar purpose.
Tags are a feature of your admin-facing ChurchSuite modules only and are not surfaced in the member-facing My ChurchSuite. You can optionally restrict tag visibility - only permitted users will see restricted visibility tags.
Tags can only be assigned to people in the Active section of a module - people are removed from tags when they are archived or deleted. People can be assigned to multiple tags.
Within ChurchSuite are two types of tags: Fixed Tags and Smart Tags. Fixed Tags are a fixed list of people that largely remain unchanged over time unless the tagged people list is updated by a module User. Smart Tags work using conditions so that only those whose data meets the conditions are tagged. This means that Smart Tags are dynamic, remaining up to date as people's data changes over time, with smart tags being auto-assigned and auto-removed as people meet or cease to meet the tag conditions. Smart tags update every minute and also when a tag "view" page is opened.
We've produced a separate support article for Smart Tags. In the remainder of this article, we'll focus on Fixed Tags in the Address Book, but the same fixed tag principles and functionality exist in the Children and Giving modules.
Assigning people to a fixed tag
Fixed Tags are assigned (and removed) directly from a person's profile page by clicking the Add to tag pill in the tags section of the person's Details tab:

From here, you can search and select inline from your existing fixed tags - the list of matching fixed tag filters as you type.

You can also remove previously-assigned fixed tags. Hover over a fixed tag and click X. On mobile devices, unassigning a fixed tag in this way has a 2-step process with confirmation, to avoid inadvertent tag removal when working on a touchscreen device.

Note: You will only see Fixed Tags listed when assigning tags to a person. By definition you can't assign people to or remove people from Smart Tags - a person is automatically smart-tagged or untagged depending on whether they meet the Smart Tag's conditions.
Managing tags
Tags can also be assigned when working in the Tags section of a module. In this section, you can manage all your existing Fixed and Smart tags. Smart Tags are distinguished by a blue rotating arrow symbol. The tag Actions enable you to View, Duplicate, Edit or Delete a tag. Deleting a tag will not delete the tagged people; it removes the tag assignment from all tagged people. You can assign colours to tags, perhaps to distinguish different types of tags e.g. Discipleship tags, Safeguarding tags, and Newcomer tags. New tags are added by clicking Add tag.

On the Add tag pop-up, give the tag a suitable tag Name, perhaps adding an optional Description to help module Users understand what the tag is for - a consistent tag-naming convention will help keep long lists of tags better organised and avoid users creating the same tags with different names. Optionally assign a Colour and set to which Users the tag is Visible to - see the related support article for further information on Restricting visibility and access with User Groups. See the related support article for further information on Smart Tags. Click Save.

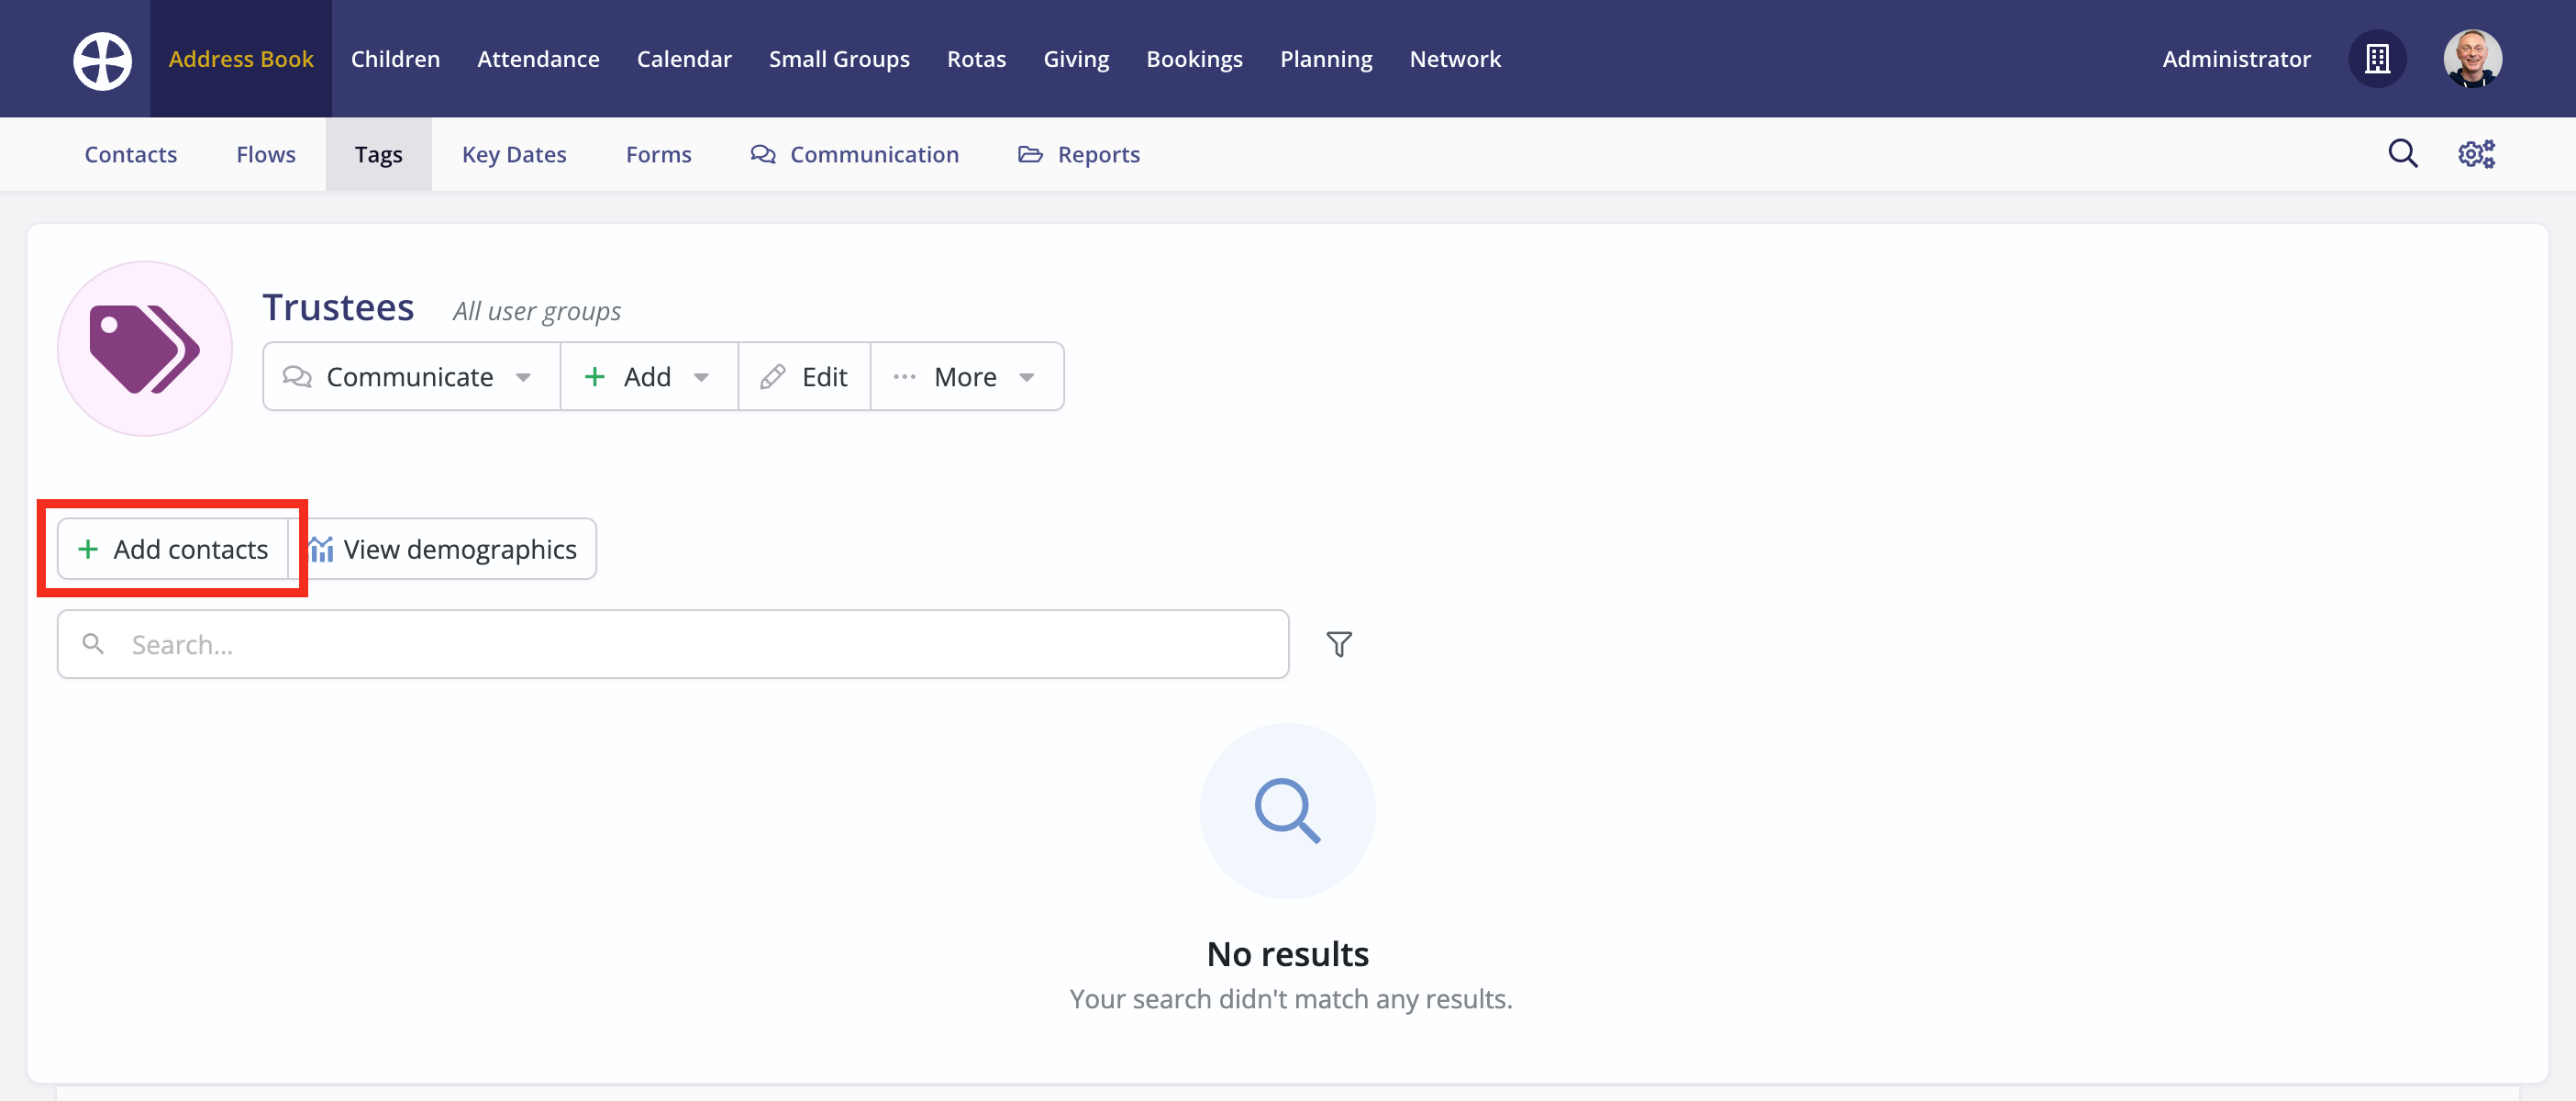
The tag View opens. To assign people to the tag, click Add [people].
On the Add [people] pop-up, search and select those you wish to assign to the tag. The list of matching results filters as you type. Note that you can bulk-add people from other tags - the results show people and tags.
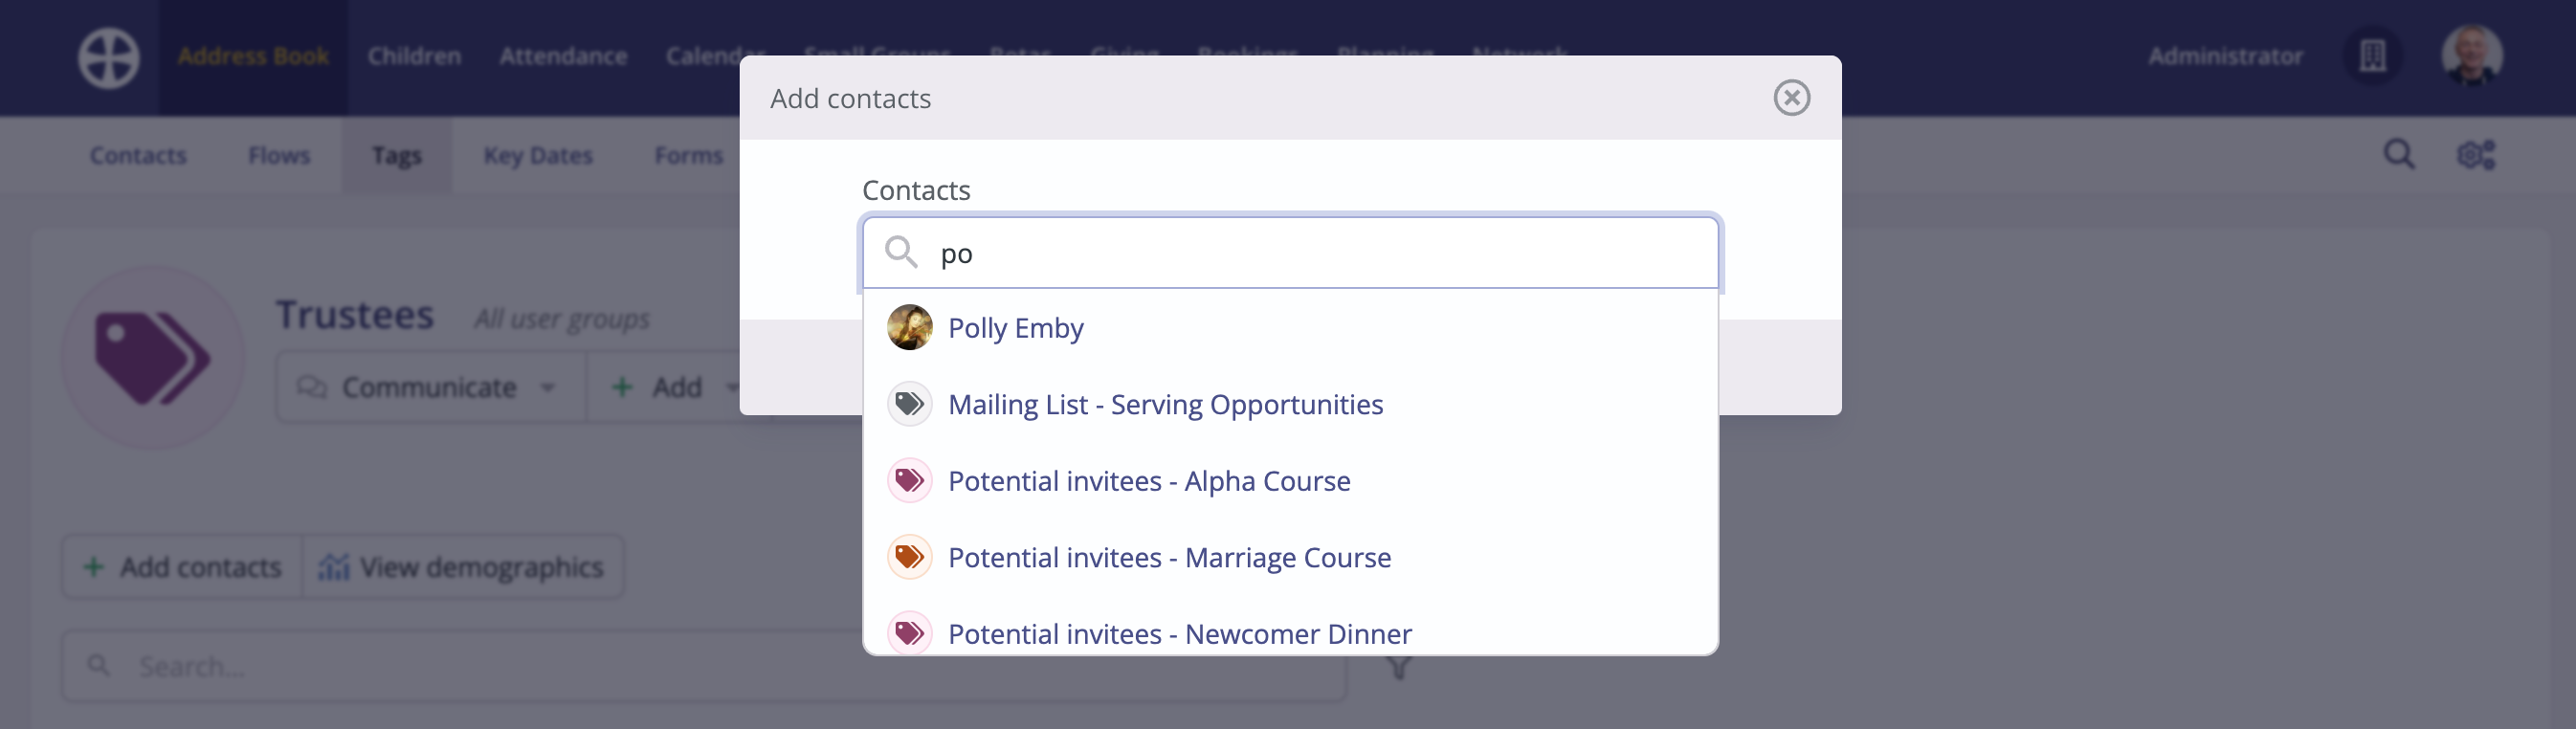
Continue selecting other people as appropriate. Click Save to apply the changes.

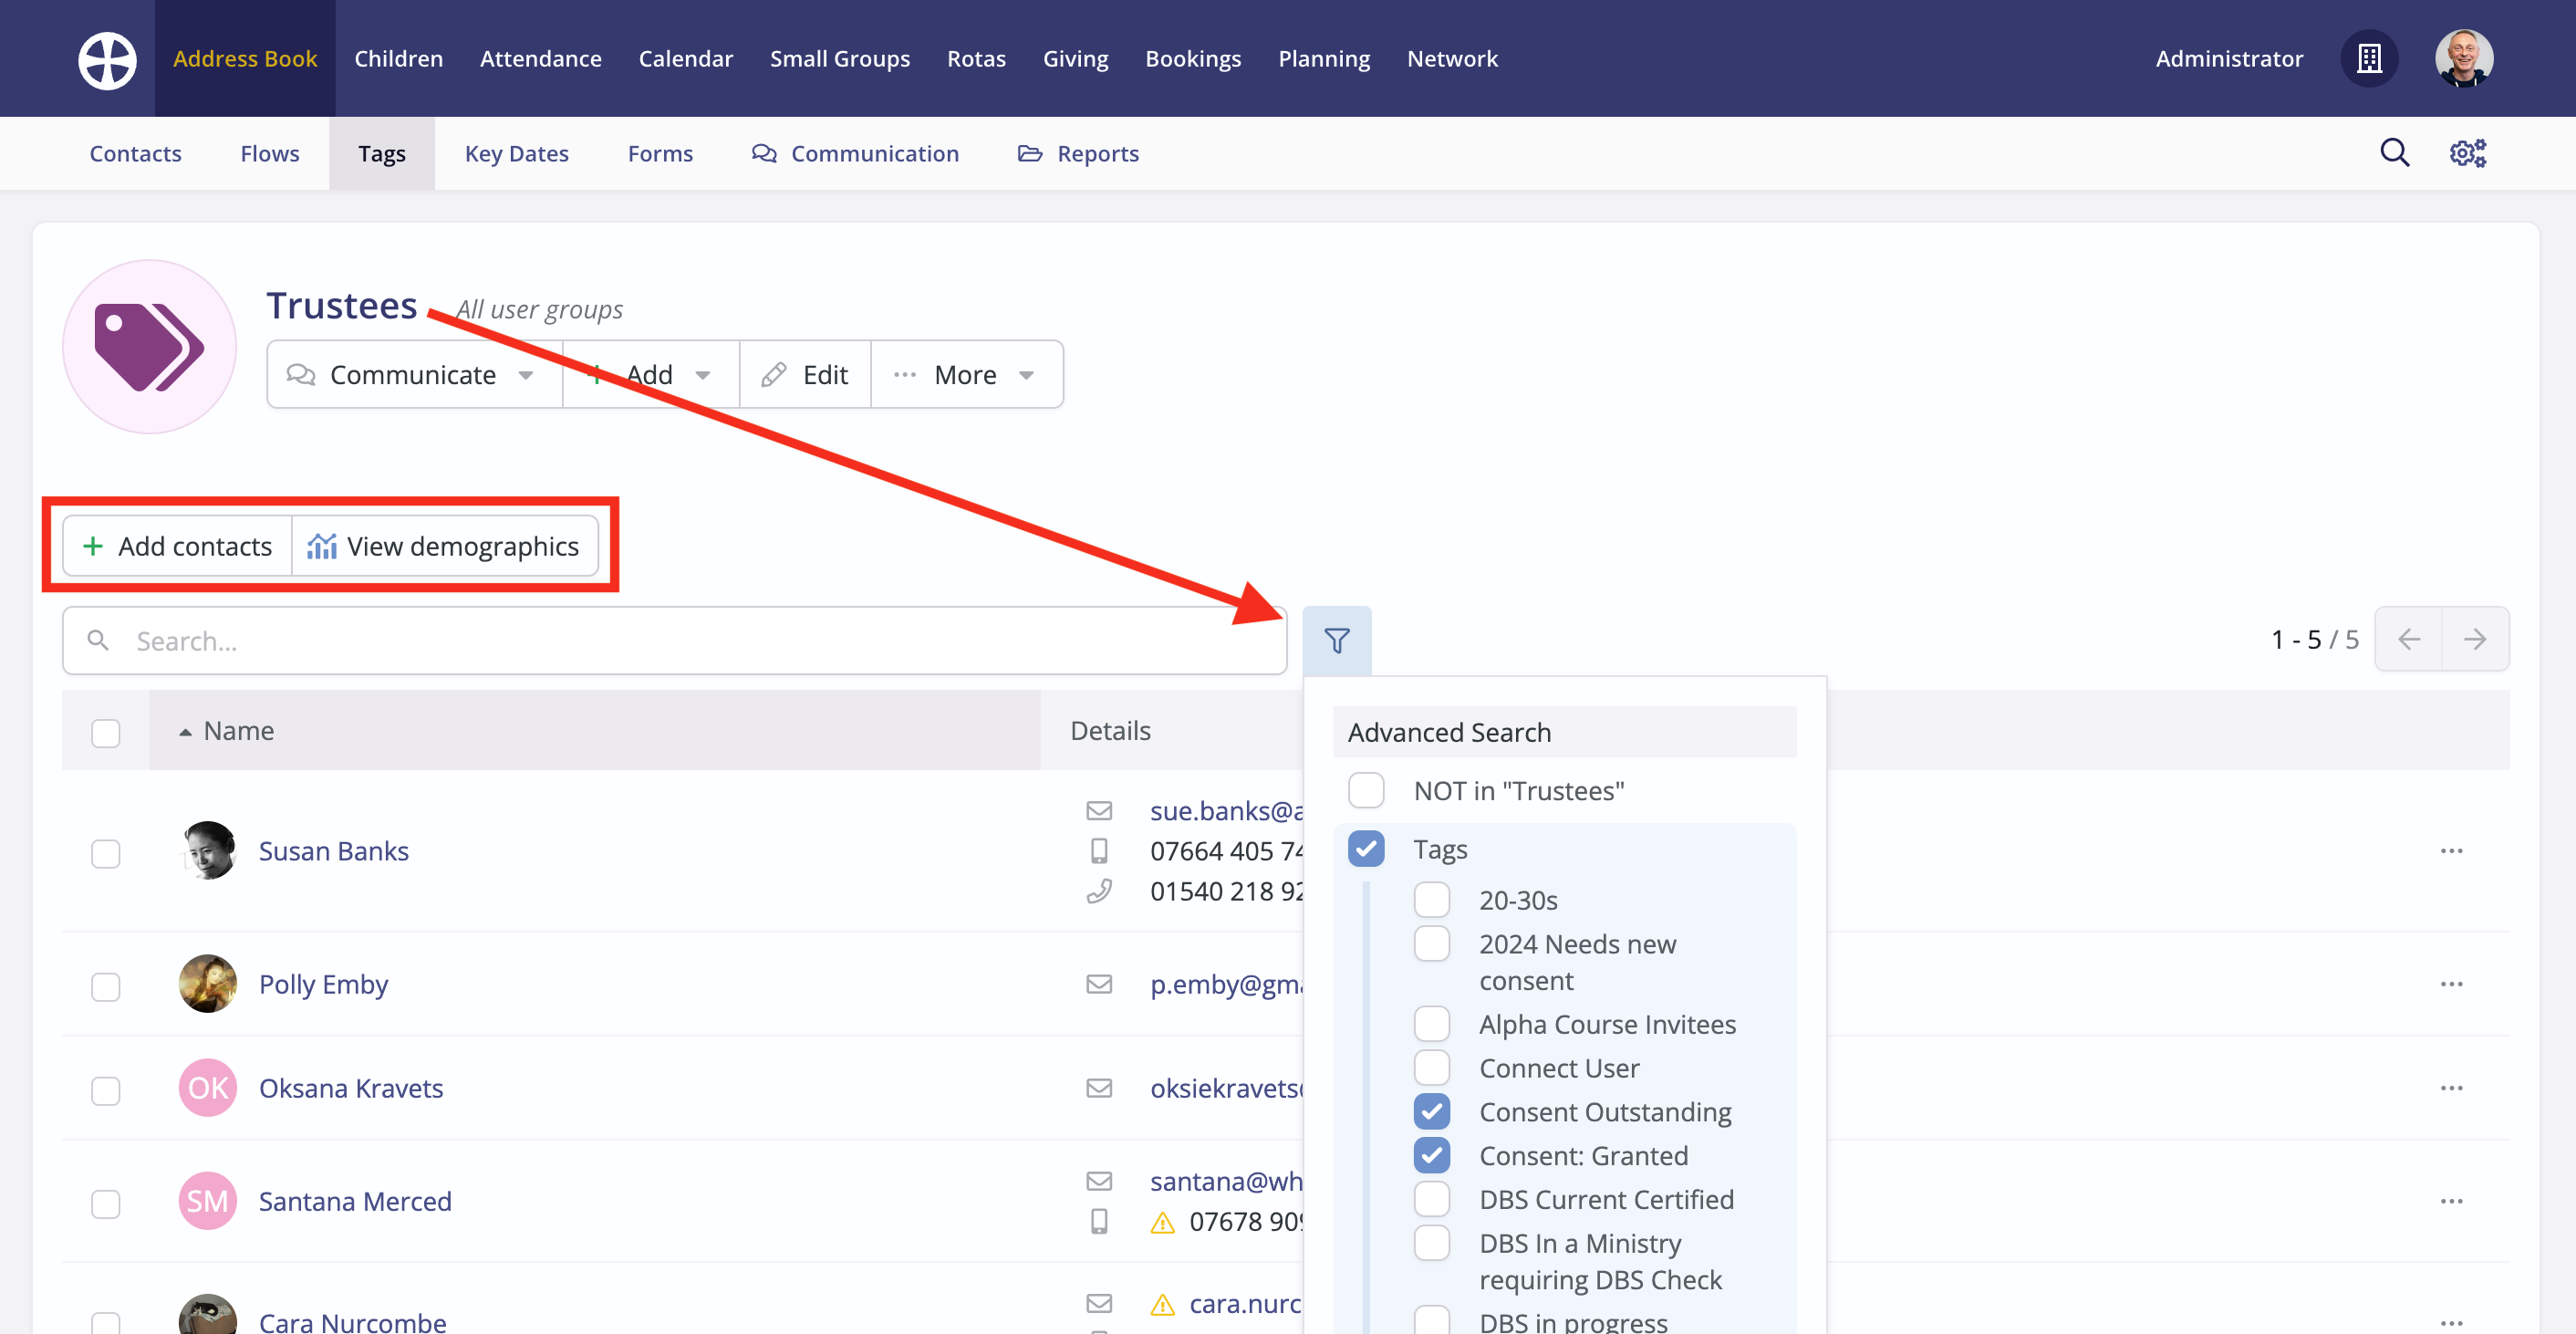
The tag View updates to reflect the newly added people. Note the options to View demographics for the Tag and the Advanced Search options to invert a tag to see people Not in the tag and to further filter the list by other Tags. You can return to the tag View at any time to Edit and make changes to the tag settings...
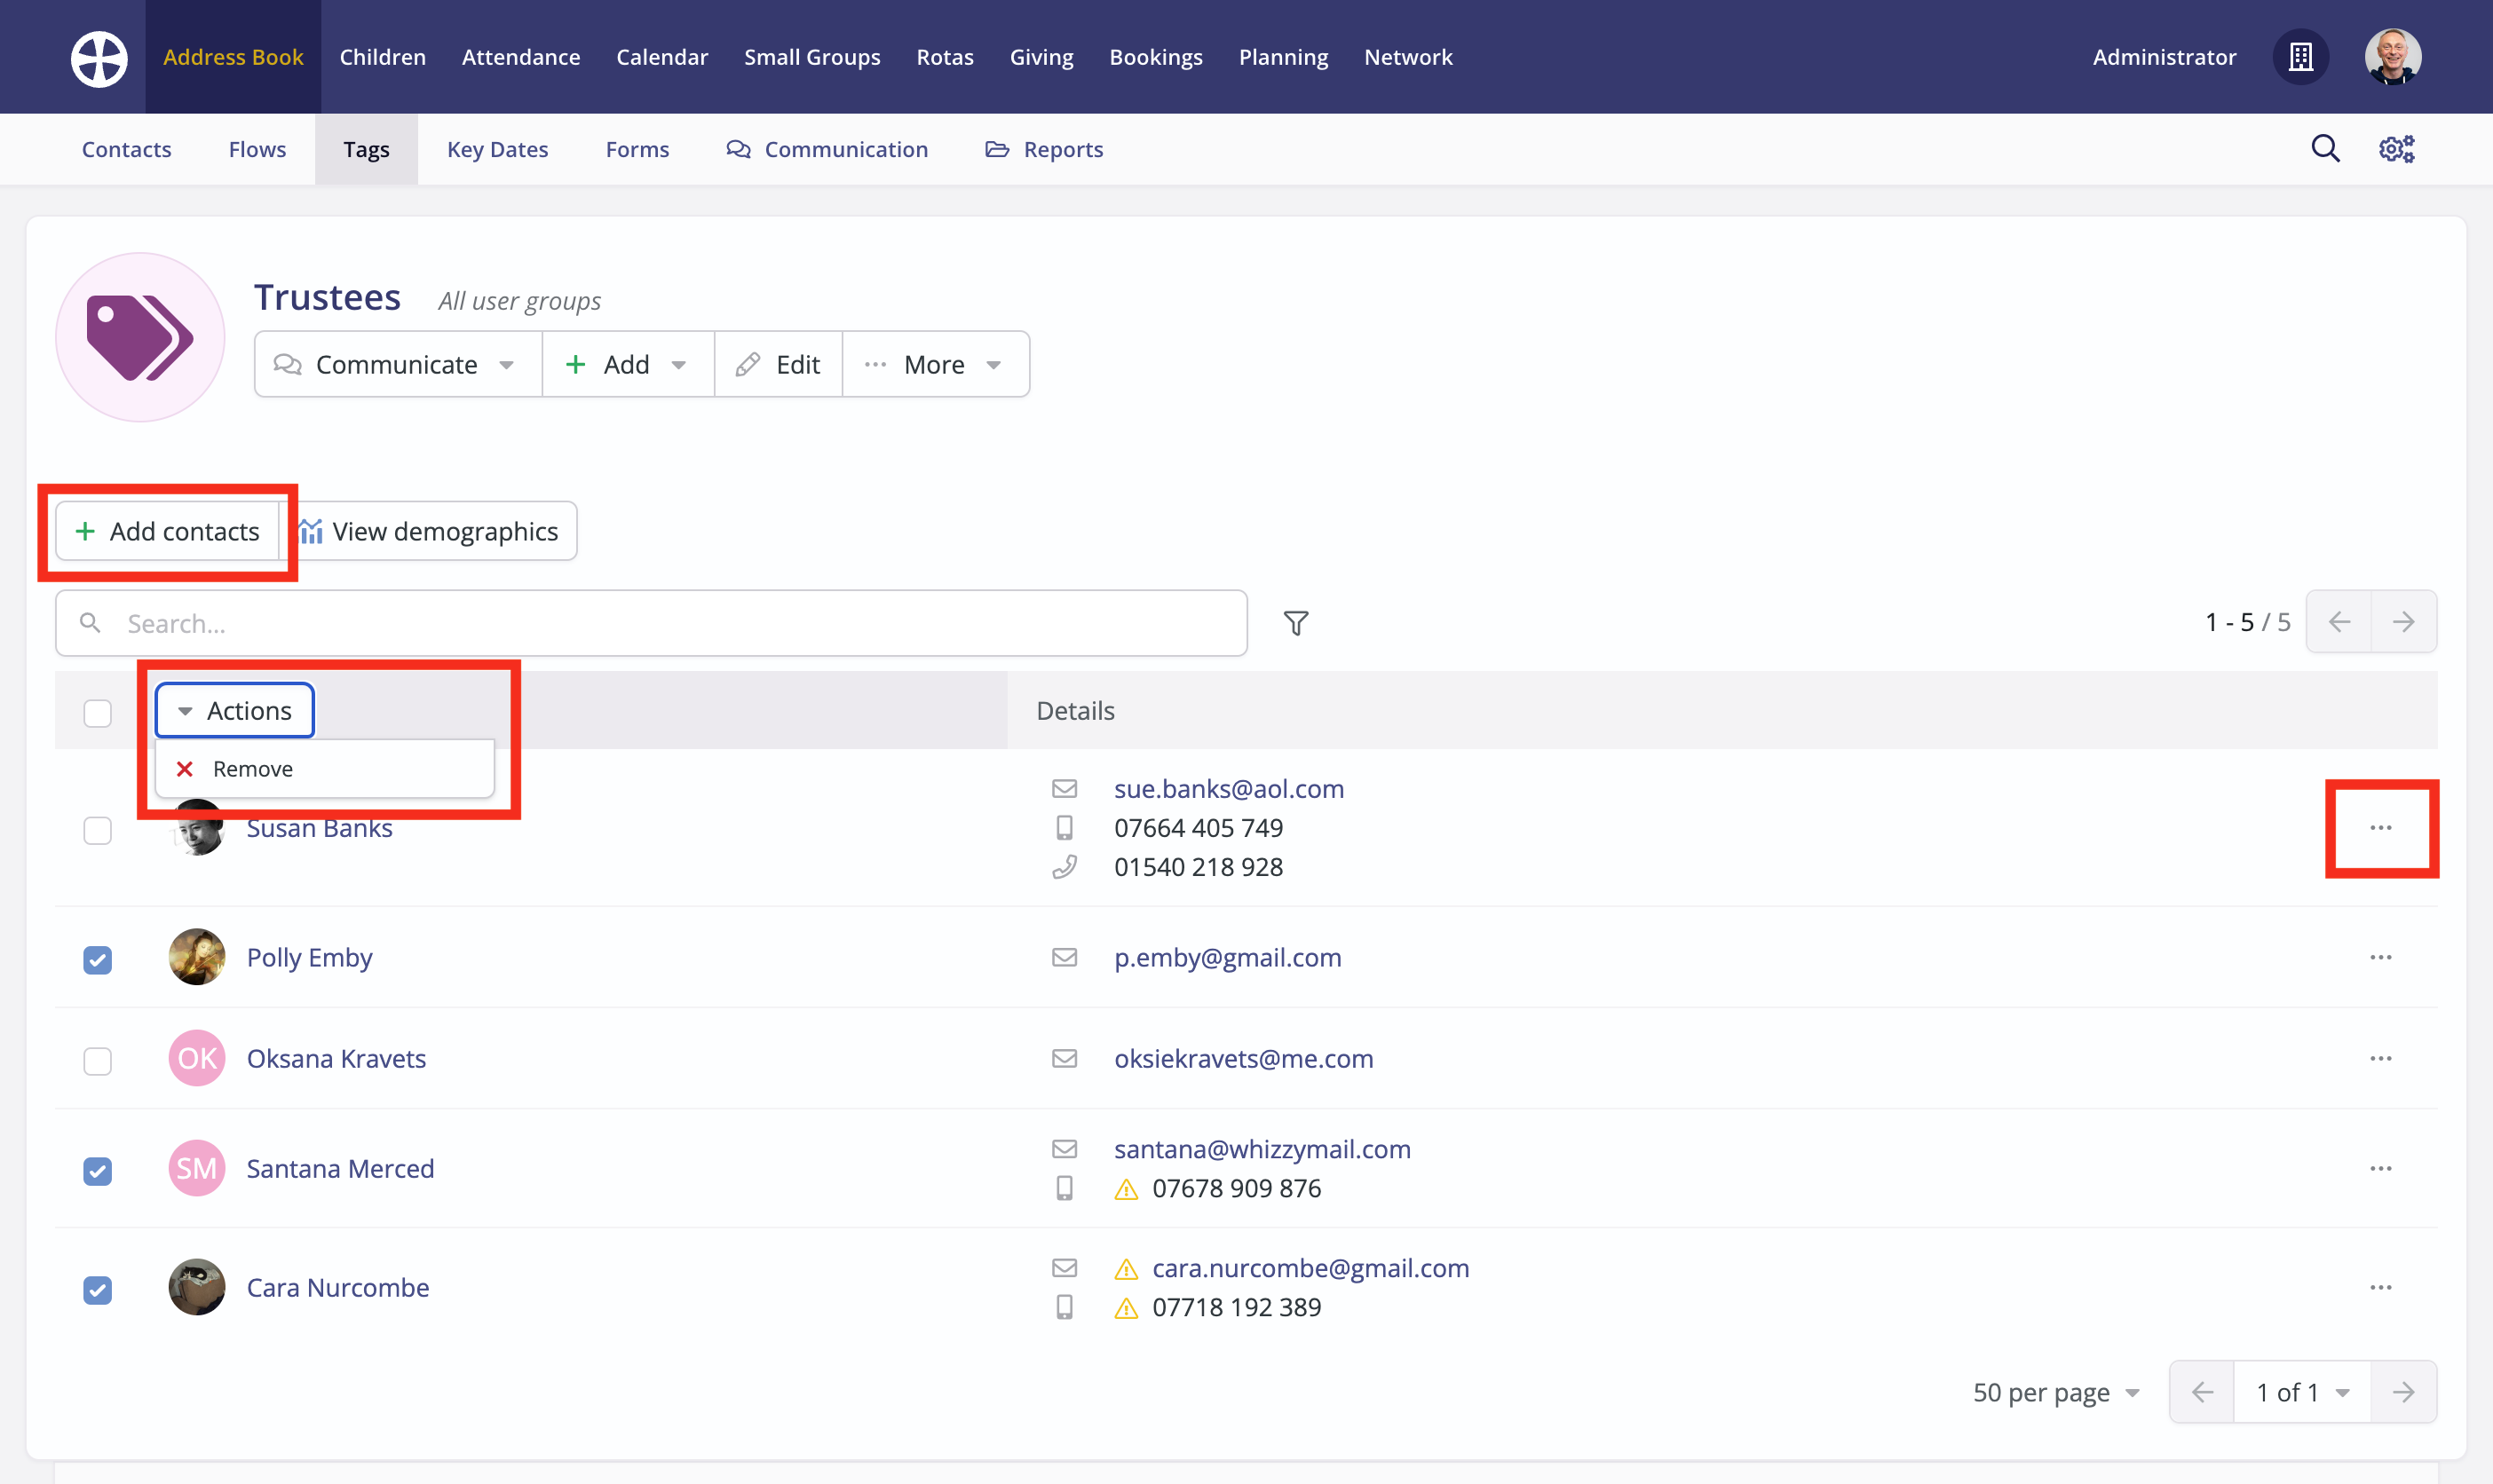
or use the actions to Add [people] or Remove selected people.
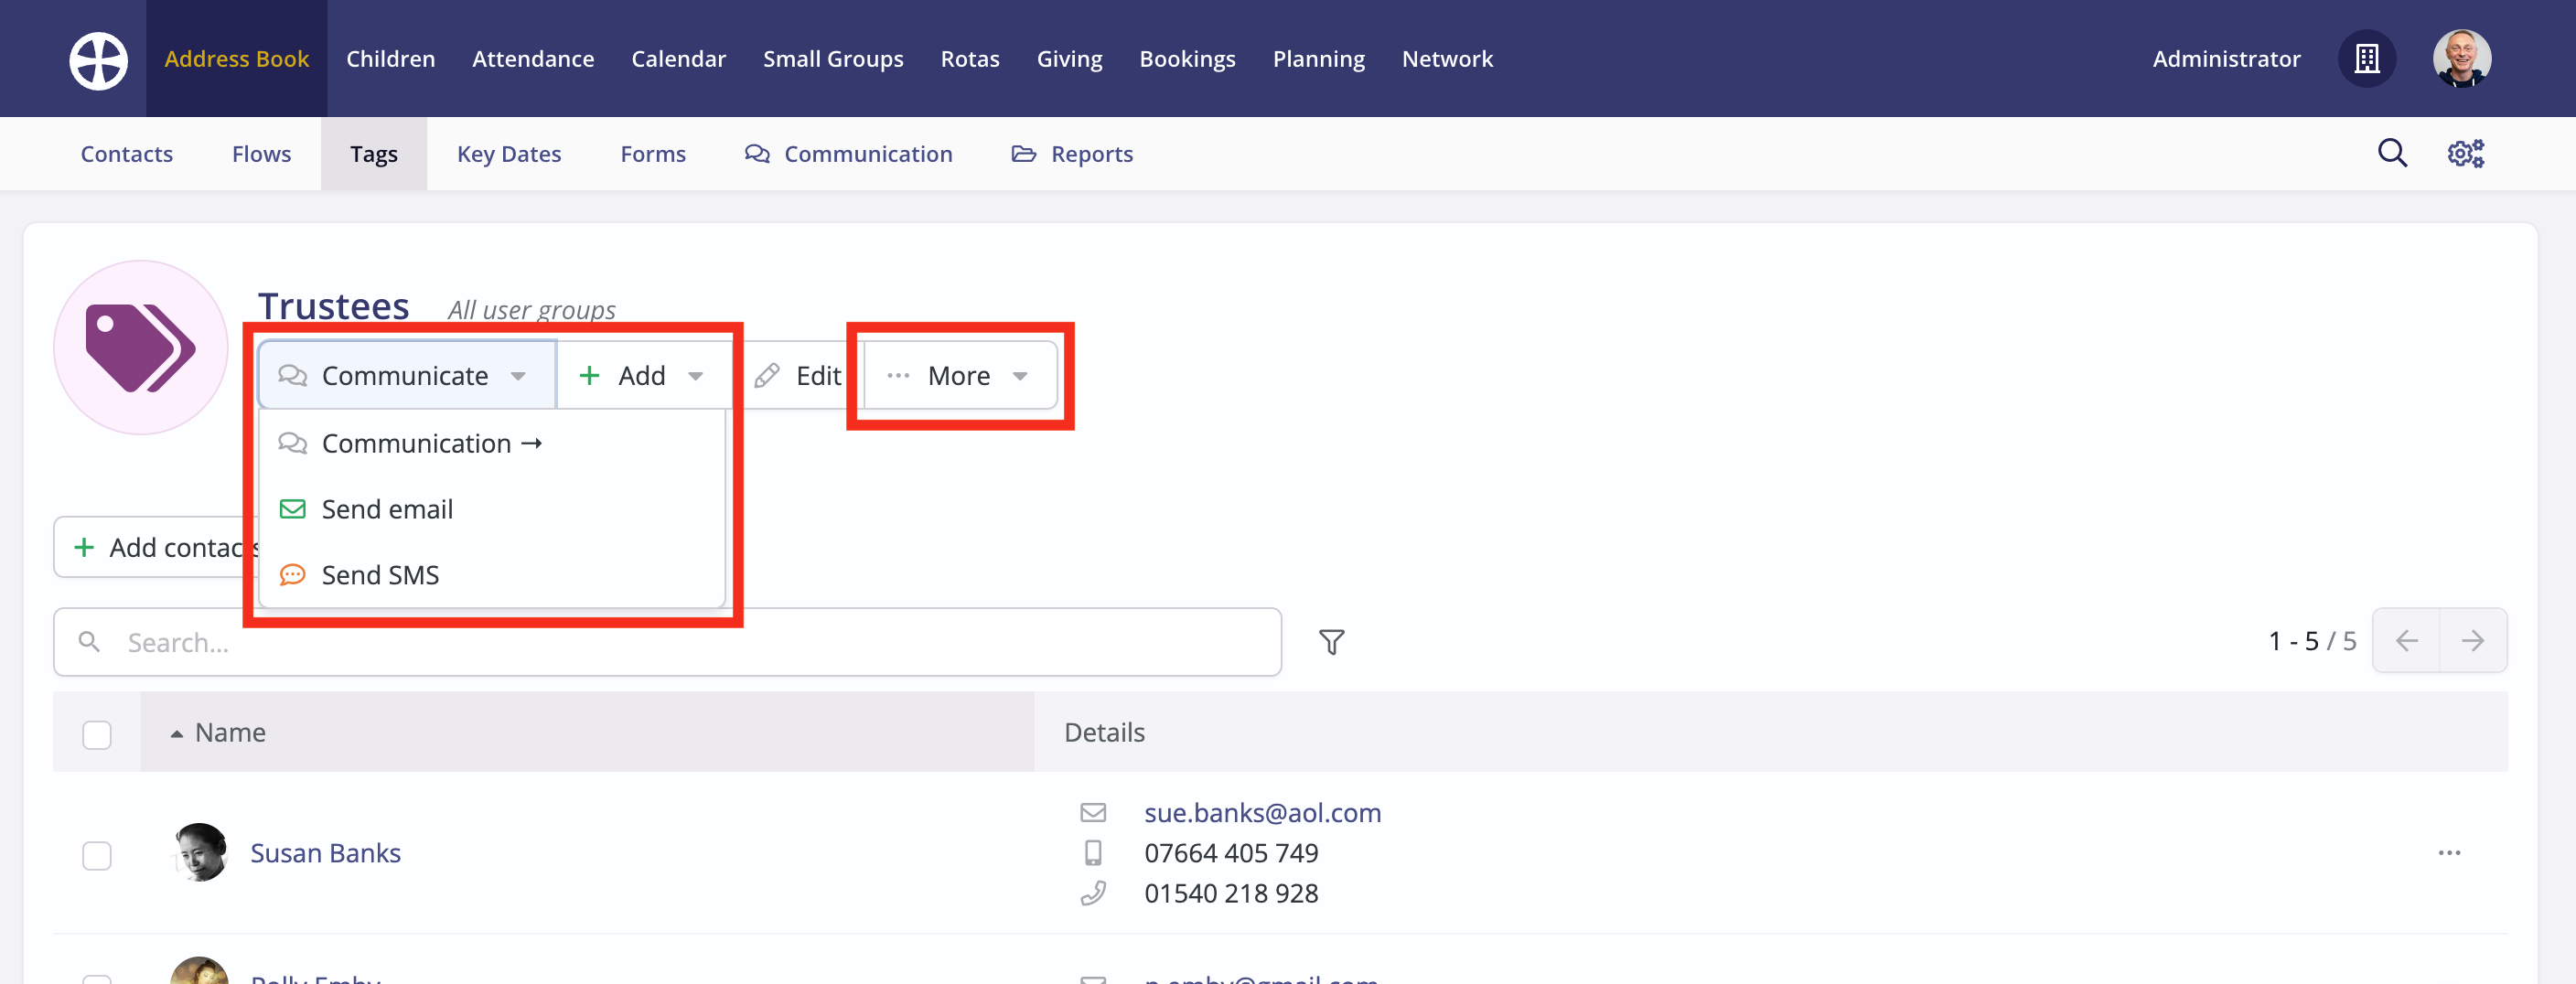
Note the options to Communicate with those in the Tag - perhaps to send an email or SMS to just those people. You can also Print badges (accessed from the More actions), which will be formatted to the label stock size specified in the module settings.
Finally, a Changes log is maintained for each Fixed Tag - select View changes from the More actions. Note that Fixed Tag changes are not shown on a person's profile page, however, a log of all removed fixed tags is added to a person's profile page if they are archived.